Manufacturing on Demand
Certified and Quality Driven
Full-Cycle Supply Chain Solutions
- Vetted Supplier Network
- Tight-tolerance Capabilities
- In-House Production Expertise
- Dedicated Program Management
- Multi-Year Program/Product Agreements


Trusted by Engineers and Purchasing Leaders at the World’s Most Successful Companies


Turbocharge the Way You Make Custom Parts
Put Our Digital Manufacturing Marketplace to Work for You

Massive Network Capacity
Instantly access the production capacity of over 10,000 manufacturers with wide-ranging capabilities and certifications across 46 US states, Europe, and Asia straight from your desktop. More on our Supplier Network.
Instant Quoting
Get pricing, lead times, and design-for-manufacturing feedback in a matter of clicks, not days. The Xometry Instant Quoting Engine® puts data science to work so you can easily choose your project’s optimal price and lead time. Learn more about our instant quoting technology.
Quality Assurance
We are ISO 9001:2015, ISO 13485:2016, and AS9100D certified. Xometry is ITAR registered. Learn more about our quality assurance.
Industry-specific Experience
Our precision applications are perfect for aerospace, defense, automotive, medical, robotics, industrial, consumer electronics industries, and many more. We offer CoCs, material certifications, finishing certifications, inspection reports, and hardware certifications.
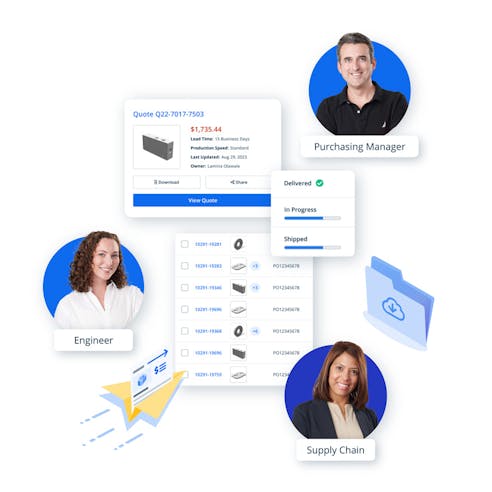
Maximize Collaboration with Teamspace
Collaborating with others on your manufacturing projects has never been easier with Teamspace. It is a feature within your Xometry account that allows you to easily work with other users on projects and custom part orders. Teams simplify purchasing workflows. For instance, you can get an instant quote on your personal dashboard, and when you’re ready to order, share the quote with an entire purchasing or procurement team you’ve made. Teamspace provides a unified Xometry experience, giving your team members quick and easy access to quotes, order placement, part statuses, tracking information, and more. You can create a Team today or click here to learn more about how Teamspace works.
We’re Your Partner From Prototyping to Production and Beyond
Xometry offers a range of solutions to help you develop practical prototypes and scale up to production parts. Make custom parts on demand using more than 70 materials across over 20 processes. Put our network of over 10,000 highly vetted manufacturers and our skilled applications engineering team to work for you.
Get quotes within seconds on CNC machining, 3D printing, sheet metal fabrication, urethane casting, and more. Upload a 3D CAD file and receive the price, lead time, and design-for-manufacturing feedback instantly.
Xometry delivers high-quality, on-demand injection molding for prototypes and production parts. Dozens of materials, insert molding, compression molding, silicone rubber molding, and more options are available. Learn more about Xometry's Injection Molding Service.
Xometry adds value through its massive global supply chain and secondary services like assembly or weldments. The team can create, kit, and provide turnkey products to your specifications.
New to Xometry? Get started with a quote.
Metal and Plastic Production Solutions
Xometry’s digital manufacturing marketplace is your one-stop solution for production. Our team is the perfect solution for your product manufacturing needs with our staff of technical experts, ease of our secure quoting platform, and global manufacturing capacity.
Xometry offers competitive pricing and lead times on plastic injection molding, metal injection molding, die casting, metal stamping, metal extrusion, plastic extrusion, sheet metal, laser cutting, waterjet cutting, laser tube cutting, and tube bending services. Start your quote or contact us today to begin.

Xometry Go Green Initiative
Xometry is committed to promoting environmental sustainability across our services. We have partnered with Dot Neutral, an organization that matches businesses with carbon emission offset initiatives, including reforestation, renewable energy, capturing harmful gases, and more.
Each time a package is shipped from all Xometry divisions, Dot Neutral charges Xometry a fee. That money is invested in an initiative to reduce or offset the emissions by up to 100%. Customers also have a choice to partially or wholly offset the emissions produced by fabricating their parts each time they order.
Learn more about our Go Green Initiative.

What Our Customers Say


Ready to Get a Quote?
Take advantage of our network and see what Xometry can do for you.
Latest Capabilities


Learn About Manufacturing Processes, Technologies, and Materials


Latest 3D Printing Guides


Latest Injection Molding Articles

What is the 3D Printing vs Injection Molding Cost-per-Unit Breakeven?

Metal Injection Molding (MIM): Process, Uses, Advantages, and Disadvantages


Latest Materials Articles


Latest Sheet Cutting Articles


By entering your contact information, you are agreeing to receive email communications about Xometry products and services. You may update your subscriptions or unsubscribe from these communications at any time using the link at the bottom of every marketing email or by contacting support. For more information, review our Privacy Policy.